Most homes still rely on manual switches, traditional locks, and disconnected appliances. That wastes time, energy, and money. DIY home automation lets you control lights, security, temperature, and devices using affordable hardware and simple software without hiring professionals.
The biggest advantage is flexibility. You choose which systems to automate first. You can start with lighting, then expand to security, climate control, and voice assistants.
This guide explains exactly how DIY home automation works, which tools to buy, what projects to build first, and how to create a reliable smart home step by step.
What Is DIY Home Automation?
DIY home automation means building smart control systems yourself using devices like smart plugs, sensors, Raspberry Pi controllers, and automation software. It allows remote control, scheduling, and automation of lighting, appliances, security, and climate without professional installation or expensive subscription services.
DIY home automation replaces manual routines with automated workflows. Instead of switching lights on manually, sensors detect movement. Instead of adjusting temperature daily, schedules control it automatically.
Unlike commercial smart-home packages, DIY setups are modular. You choose devices individually. That reduces costs and increases compatibility flexibility.
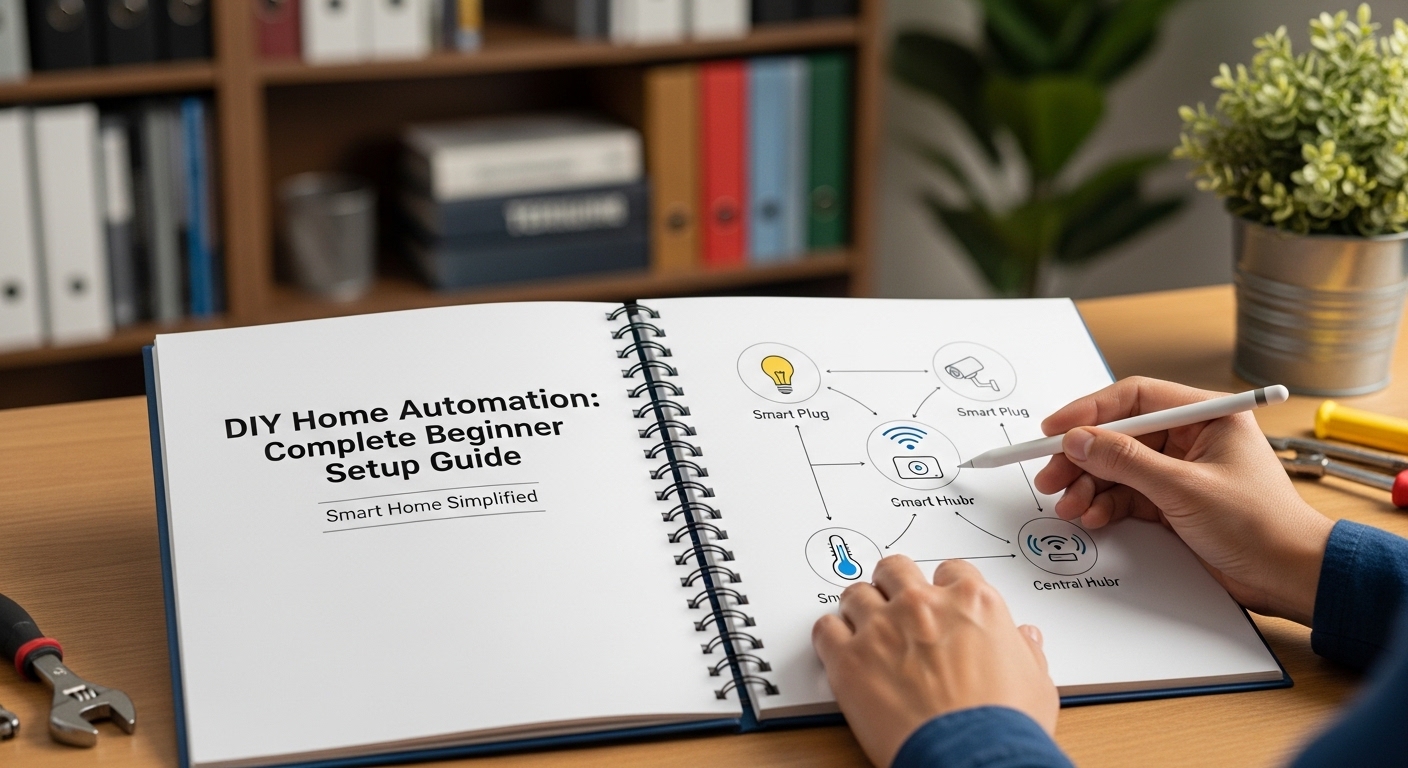
Most DIY automation systems operate through three layers:
- Input devices like motion sensors and switches
- Controllers such as Raspberry Pi or smart hubs
- Output devices like lights, alarms, and appliances
This structure allows automation rules such as:
- Turn lights on after sunset
- Switch fans off when nobody is home
- Send alerts when doors open
Because systems are customizable, DIY automation works in apartments, small homes, and large houses.
Why Should You Build a DIY Smart Home Instead of Buying One?
DIY smart homes cost less, offer customization flexibility, avoid subscription lock-ins, and allow integration across multiple platforms. They also improve privacy control because data stays within your local network instead of cloud-based proprietary ecosystems.
Commercial automation kits are convenient but limited. They usually restrict device compatibility and require monthly services.
DIY systems remove those restrictions.
Key advantages include:
- Lower installation cost
- Expandable architecture
- No brand lock-in
- Offline automation capability
- Higher privacy protection
For example, a professionally installed automation lighting system may cost several hundred dollars. A DIY setup using smart plugs and motion sensors costs a fraction of that.
Another advantage is learning value. Building automation systems improves technical understanding of networking, IoT devices, and automation logic.
This knowledge helps maintain and upgrade systems without external support.
What Equipment Do You Need for DIY Home Automation?
Basic DIY home automation requires a controller device like Raspberry Pi, smart plugs, motion sensors, wireless switches, automation software such as Home Assistant, and a stable Wi-Fi network. These components create the foundation for scalable automation projects.
Choosing the right hardware determines system reliability.
Below is a comparison of common automation components:
| Component | Purpose | Beginner Friendly | Cost Range |
|---|---|---|---|
| Raspberry Pi | Automation controller | Yes | Low |
| Smart Plug | Control appliances | Yes | Low |
| Motion Sensor | Trigger automation | Yes | Low |
| Relay Module | Control wired circuits | Intermediate | Low |
| Smart Switch | Lighting automation | Yes | Medium |
Most beginners start with smart plugs because they require no wiring knowledge.
Advanced users later integrate relay modules for controlling ceiling lights, fans, and security alarms.
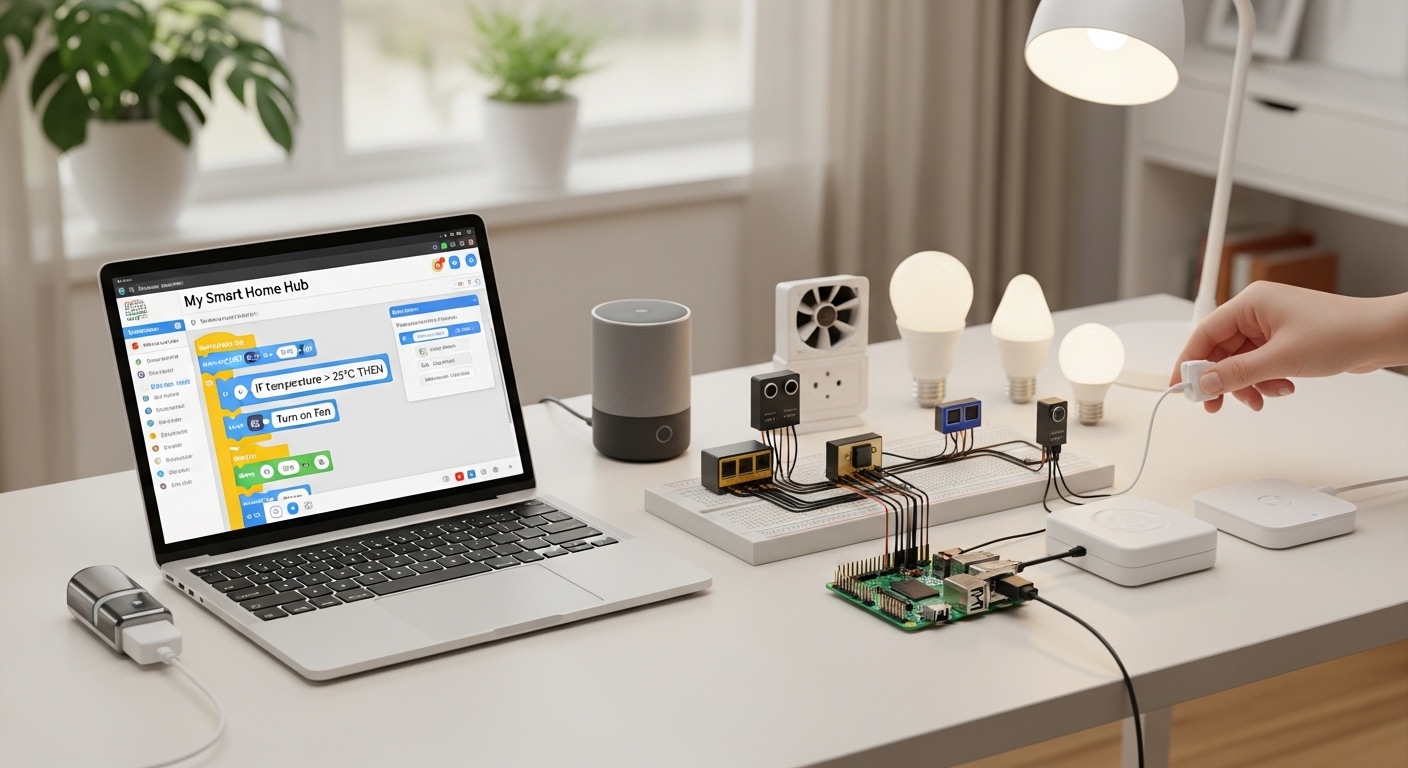
How Does Raspberry Pi Work in DIY Home Automation?
Raspberry Pi acts as a central automation controller that runs software like Home Assistant to manage sensors, switches, and smart devices. It processes automation rules locally and enables remote monitoring, scheduling, and device integration without relying on cloud platforms.
Raspberry Pi is one of the most powerful tools for automation beginners.
It connects devices using:
- Wi-Fi
- Bluetooth
- Zigbee adapters
- USB sensors
Once installed, automation software allows rule creation such as:
- Turn lights on at sunset
- Activate alarm if door opens at night
- Send phone notification when motion detected
Local processing improves speed and reliability.
Unlike cloud automation systems, Raspberry Pi continues working even when internet connectivity fails.
This makes it ideal for security automation projects.
What Are the Best Beginner DIY Home Automation Projects?
The best beginner projects include smart lighting automation, motion-activated security alerts, scheduled appliance control, voice assistant integration, and energy monitoring setups. These projects require minimal wiring knowledge and provide immediate improvements in convenience and efficiency.
Starting with simple projects builds confidence.
Recommended beginner projects include:
- Automatic hallway lighting using motion sensors
- Wi-Fi controlled fan or heater
- Scheduled outdoor lights
- Smart door alerts
- Voice-controlled appliances
Each project introduces essential automation concepts like triggers, actions, and schedules.
For example, motion-activated lighting uses:
- Sensor input
- Automation rule
- Smart switch output
This structure forms the foundation for advanced automation later.
How Can DIY Automation Improve Home Security?
DIY automation improves security by integrating motion sensors, smart cameras, door sensors, alarms, and mobile alerts into a unified monitoring system. Automated triggers detect unusual activity instantly and notify homeowners in real time without requiring professional surveillance services.
Security automation is one of the most practical upgrades for any home.
Typical automation scenarios include:
- Door opens after midnight triggers alarm
- Motion detected sends phone notification
- Outdoor lights activate automatically at night
Combining sensors increases accuracy.
For example:
Motion detection + time condition = fewer false alarms
Camera integration adds visual confirmation before action.
This layered automation approach improves safety while reducing unnecessary alerts.
How Much Does DIY Home Automation Cost?
DIY home automation can cost between $30 and $250 depending on device selection. Basic setups using smart plugs and sensors are inexpensive, while advanced systems with Raspberry Pi controllers, relays, and cameras require moderate investment but remain cheaper than professional installations.
Budget flexibility makes DIY automation accessible.
Typical starter setup cost example:
- Smart plug: low cost
- Motion sensor: low cost
- Raspberry Pi controller: moderate cost
- Automation software: free
Compared to commercial automation packages, this saves significant money.
Costs also remain scalable.
You can automate one room first and expand gradually.
How Do You Build a Reliable DIY Automation System Step by Step?
A reliable DIY automation system starts with selecting a controller platform, installing automation software, connecting sensors and switches, creating automation rules, and testing workflows before expanding to additional rooms and devices for full-home integration.
Following a structured setup process prevents compatibility issues.
Step-by-step workflow:
- Select controller device
- Install automation software
- Connect smart plugs or switches
- Add sensors
- Create automation rules
- Test triggers and responses
- Expand gradually
Testing each stage ensures stability.
Many beginners skip testing and face automation failures later.
A layered setup approach prevents system conflicts.
Conclusion: Is DIY Home Automation Worth Building?
DIY home automation transforms ordinary houses into intelligent living spaces without expensive installations. It improves convenience, saves energy, increases security, and gives full control over devices.
Unlike commercial smart-home packages, DIY systems grow with your needs. You start small and expand gradually.
Motion sensors automate lighting. Smart plugs control appliances. Raspberry Pi creates centralized intelligence. Together, these components build a powerful automation environment.
The most important step is starting with one simple project. Once the first automation works, expanding the system becomes easier and faster.
If you want a smarter home without high costs or technical restrictions, begin your first DIY automation project today and build your system one device at a time.
FAQs About DIY Home Automation
Is DIY home automation difficult for beginners?
No. Beginners can start with smart plugs and motion sensors that require no wiring. Platforms like Home Assistant provide simple interfaces for creating automation rules.
Can DIY automation work without internet?
Yes. Local controllers like Raspberry Pi run automation offline. Internet is only required for remote access features.
Which software is best for DIY smart homes?
Home Assistant is widely recommended because it supports multiple devices, runs locally, and allows advanced automation customization.
Is Raspberry Pi necessary for automation?
No. Beginners can use smart hubs or cloud devices. However, Raspberry Pi improves flexibility and removes subscription dependence.
Can automation reduce electricity usage?
Yes. Scheduled shutdowns, motion-based lighting, and smart thermostats reduce unnecessary power consumption significantly.
Are DIY smart homes secure?
Yes if configured correctly. Using local automation servers and strong Wi-Fi passwords improves privacy and protection.
How long does it take to build a DIY smart home?
A basic setup can be completed in one day. Full-home automation typically develops over several weeks as devices are added gradually.
Read More Also: How to Remove Rust Stains from Concrete (No Chemicals)

Average Rating