
The Secret to Affordability: Insider Tips for Maximizing Furniture Store Discounts
The demand for new furniture continues to rise, but the supply needs to catch up. That’s why shoppers are turning to discounts to save money.

Best Home Decor Ideas
The demand for new furniture continues to rise, but the supply needs to catch up. That’s why shoppers are turning to discounts to save money.

Decorating a room, whether it’s the bedroom, the kitchen, or the living room, is a never-ending process. There will be days when you wake up and want to switch up everything, and days when you will love everything about your home yet want to change a few aspects which will also

Opportunities for outdoor-indoor life are a pipe dream for most of us who live in apartments. So, if yours has a balcony, don’t just rejoice:

For many of us the dream of our lives is to be able to live in a home that meets all of our requirements. This is the dream that you have to make sure your chosen architect also shares. For that you will be in the very safest of hands with the Residential Architects Islington based company https://www.rbddesign.com/architectural-design/residential-architecture-london/architects-islington/. They will be able to take your dreams and look to make them come into a reality. What do you need to do to go to the architect to make sure that this will happen for you.

After the horrors of the Great War no one was in any mood ro things to be dull and lifeless. There was a spirit of can do and a desire to create beautiful things and revel in the joys of life. This gave rise to the period known as “the Roaring twenties”. Rich people and what was left of the British gentry had the time and independent means to go wild and enjoy themselves doing dance craze’s like the Charleston and dressing elegantly. For the rest of us, a life of work and long hours were not much different than before the war.

Blackout curtains are an excellent investment for anyone who wants to improve their sleep quality. They provide complete darkness, which helps regulate the body’s sleep-wake cycle, leading to a night of better and more restful sleep. In this article, we’ll walk you through the steps to install blackout curtains, so you can enjoy a good night’s sleep every night.
So, how to install blackout curtains? Read on to know.
Before you start, you’ll need to gather the following materials:
The first step in installing blackout curtains is to measure the window. Measure the width of the window opening and the length from the top of the window to where you want the curtains to hang.
Choose the hardware you need for your installation. You can either use a curtain rod or brackets. Brackets are a great option if you want a cleaner look, while a curtain rod is a good option if you want to add a decorative touch.
Mark the placement of the brackets on the wall. Make sure they are level and spaced evenly.
Install the brackets using screws or wall anchors. If you are using wall anchors, make sure they are securely in place before installing the brackets.
Attach the curtain rod or brackets to the wall. Make sure they are secure and level.
Finally, hang the blackout curtains on the rod or brackets. Make sure the curtains are evenly spaced and hang to the desired length.
Now that your blackout curtains are installed, it’s time to enjoy a good night’s sleep. Blackout curtains provide complete darkness, helping regulate the body’s sleep-wake cycle, leading to better and more restful sleep.
Can I Hang Blackout Curtains Without Drilling?
Yes, you can hang blackout curtains without drilling if you use a tension rod. Tension rods are designed to hold curtains in place without the need for screws or wall anchors. They are easy to install and can be a great option if you want to avoid drilling holes in your walls.
Can a Tension Rod Hold Blackout Curtains?
Yes, a tension rod can hold blackout curtains, but it’s important to choose the right size and strength of the tension rod to ensure it can support the weight of the curtains. If the tension rod is too weak or too small, it may not be able to support the weight of the curtains, causing them to fall down.
What is the Rule of Thumb for Hanging Curtains?
The general rule of thumb for hanging curtains is to hang them 6 inches above the window frame and 1 inch outside the window frame on each side. This allows the curtains to hang neatly and provides enough space for light to enter the room. However, this rule may vary depending on the style and size of your curtains and the look you are trying to achieve, so feel free to experiment with different heights and widths.
Installing blackout curtains is a quick and easy process that can greatly improve your sleep quality. With a few simple steps, you can enjoy a dark and peaceful sleep environment every night. So, gather your materials, follow the steps, and start getting the sleep you deserve.

Hanging a bed sheet from the ceiling can create a cozy and unique space in your home. Whether it’s for a reading nook, a play area for kids, or just a comfortable place to lounge, this DIY project is simple and affordable. In this guide, we’ll take you through the steps on how to hang a bedsheet from the ceiling with confidence.
The first step in hanging a bed sheet from the ceiling is to measure the space you want to hang it in. Measure the width and height of the area, and then add 6-12 inches to each measurement to account for draping.
Next, choose the hardware you’ll need to hang your bed sheet. You’ll need a dowel rod or curtain rod, screw-in hooks, and a drill with drill bits. You’ll want to choose a dowel rod or curtain rod that is at least 6 inches longer than the width of your bed sheet.
Using the measuring tape, mark the points on the ceiling where you want to install the screw-in hooks. Then, drill the screws into the ceiling at the marked points. Make sure the hooks are level and spaced evenly.
Attach the rod or dowel to the screw-in hooks, making sure it is level. If you’re using a curtain rod, you may need to install brackets to secure the rod to the hooks.
Finally, drape the bed sheet over the rod or dowel and adjust it to your liking. You can use clips or pins to keep the sheet in place, or simply tuck the edges under the rod or dowel.
Can I hang a heavy bed sheet from the ceiling?
Yes, you can hang a heavy bed sheet from the ceiling, but it’s important to make sure your hardware is sturdy and secure. You may need to use heavier-duty hardware, such as a thicker dowel rod or curtain rod, to support the weight of the bed sheet.
What is the best type of bed sheet to use for this project?
The best type of bed sheet to use for this project is a flat sheet, which is more flexible and drapes nicely. You can use a fitted sheet, but it may not drape as nicely and may require additional tucking and adjusting.
How do I clean a bed sheet that is hung from the ceiling?
To clean a bed sheet that is hung from the ceiling, simply remove it from the hardware, wash it according to the care instructions, and re-hang it when it’s dry.
With these simple steps, you can transform a plain room into a cozy and inviting space by hanging a bed sheet from your ceiling. This project is easy to customize and can be done in an afternoon with just a few basic tools and materials. Enjoy your new space.
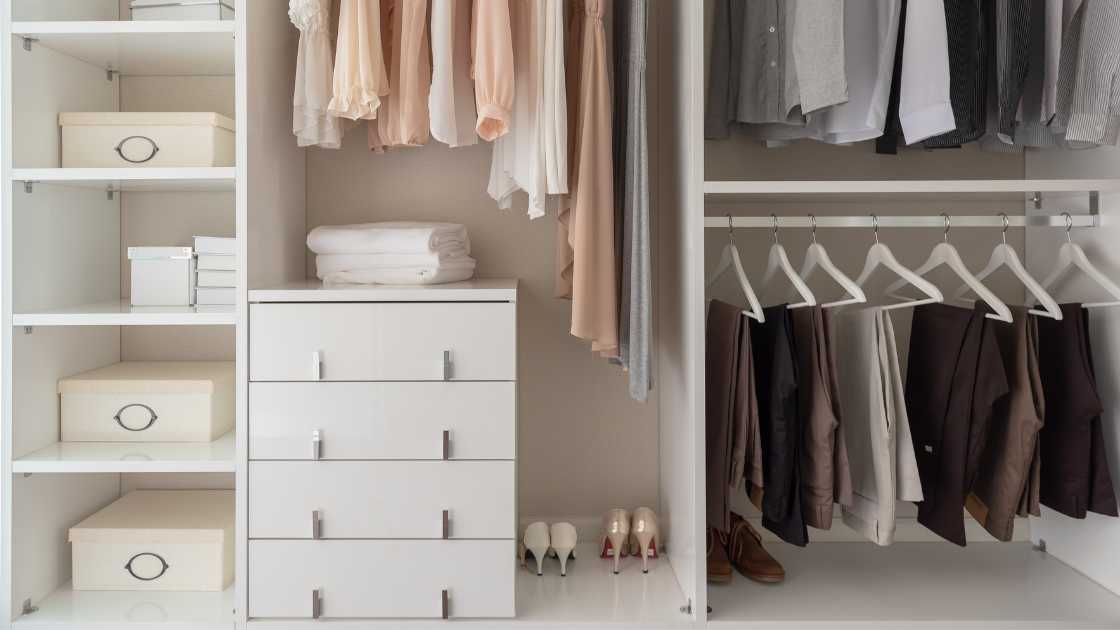
A dresser can be a great addition to a closet, providing extra storage space for clothing and other items. However, incorporating a dresser into a closet can be challenging, especially if the closet is small or oddly shaped. This guide will provide tips and tricks for putting a dresser in a closet, so you can make the most of your storage space.
Before putting a dresser in a closet, it’s important to consider the size of the dresser and the closet. Make sure that the dresser will fit comfortably in the closet and won’t take up too much space, leaving room for other storage solutions. If the dresser is too large, consider downsizing or opting for a different storage solution.
The type of dresser you choose will depend on the size and shape of your closet, as well as your storage needs. For small closets, a tall and narrow dresser may be the best option, while for larger closets, a wider dresser may be a better fit. Consider the number of drawers and the height of the dresser, as well as the material and finish, to find a dresser that works for your space.
Before installing the dresser in the closet, it’s important to prepare the space. This may involve clearing out any existing storage solutions, as well as making any necessary repairs or modifications to the closet. It’s also a good idea to measure the space to ensure that the dresser will fit comfortably.
Once the closet is prepared, it’s time to install the dresser. This may involve securing the dresser to the wall or floor or simply placing it in the closet. Depending on the size and weight of the dresser, it may be necessary to have a second person help with the installation.
After installing the dresser, it’s time to organize your closet. Use the dresser to store clothing and other items, and consider using additional storage solutions, such as shelves or baskets, to maximize the space. Make sure to keep the dresser organized, so you can easily find what you need when you need it.
Can you put a dresser inside a closet?
Yes, it is possible to put a dresser inside a closet. Doing so can provide extra storage space for clothing and other items, and can be a great solution for small or cluttered closets. However, it’s important to consider the size of the dresser and the closet, as well as any necessary modifications or preparations, before installing the dresser.
What is a dresser with a closet called?
A dresser with a closet is sometimes referred to as a “wardrobe dresser.” This type of dresser typically includes both drawers for storage and hanging space for clothing, making it a versatile and compact storage solution.
Do people put dressers in living rooms?
Yes, dressers are often used in living rooms for additional storage and organization. Dressers can be used to store items such as books, electronics, or decorative objects, and can help to declutter the living room and keep it organized. Some dressers are designed specifically for use in the living room, with finishes and styles that complement the décor of the room.
Putting a dresser in a closet can be a great way to add extra storage space and make the most of your closet. By considering the size and type of dresser, preparing the closet, and organizing the space, you can create a closet that works for your needs. With this ultimate guide, you’ll have all the tools you need to successfully incorporate a dresser into your closet.

The no baseboard look is a popular trend in interior design that involves removing the baseboards in a room to create a more modern and minimal aesthetic. This look can be achieved in both new construction and renovation projects.
There are several benefits to the no-baseboard look. One of the main benefits is that it creates a clean and uncluttered look. Removing baseboards can also make a room look larger and more spacious. Additionally, the no-baseboard look is easy to clean and maintain, making it a great option for those who want a low-maintenance home.
Achieving the no-baseboard look is relatively straightforward. The first step is to remove the existing baseboards. This can be done by prying them off with a crowbar or cutting them off with a saw. It’s important to be careful not to damage the walls or floors during this process.
Once the baseboards are removed, you’ll need to fill in any gaps or holes left behind. This can be done with wood filler or caulk. After the filler has dried, sand the area smoothly and paint or stain the walls and floors to match the existing color.
It’s important to note that removing baseboards can make a room look larger, but it can also change the way a room feels. If you’re considering removing baseboards, it’s a good idea to test the look by removing baseboards in a small area first, to make sure it’s the look you want.
What can I use instead of baseboards?
There are several alternatives to traditional baseboards that can be used to achieve the no baseboard look. Some options include:
How to do no baseboard look?
The process of achieving the no baseboard look involves removing the existing baseboards, filling in any gaps or holes left behind with wood filler or caulk, sanding the area smoothly, and painting or staining the walls and floors to match the existing color. It’s important to be careful not to damage the walls or floors during the removal process, and to test the look by removing baseboards in a small area first before committing to the look.
The no baseboard look is a popular trend in interior design that can create a modern and minimal aesthetic. It’s a relatively easy look to achieve and can have several benefits, including a cleaner and more spacious look. However, it’s important to consider the impact it may have on the feel of the room before committing to the look.

Plushies, also known as stuffed animals or plush toys, are beloved by many for their soft, cuddly texture and adorable designs. They can bring back fond memories of childhood or serve as a reminder of a favorite character or series. However, displaying plushies in a stylish and organized way can be a challenge for many. In this guide, we will show you how to display plushies in a way that is both functional and visually pleasing.
The first step in displaying your plushies is to sort and organize them. This will make it easier to decide on a display method and create a cohesive look. You can sort them by size, character, or theme. Once you have them sorted, take inventory of how many you have and what their size range is. This will help you to decide on the right display method.
There are several ways to display plushies, and the right method will depend on the size and number of plushies you have, as well as the space you have available. Some popular options include:
Creating a theme for your plushie display can add a sense of cohesiveness and make it more visually pleasing. This can be as simple as choosing a color scheme or as elaborate as creating a scene from a favorite movie or book.
Lighting can enhance the look of your plushie display and make it more eye-catching. You can use a combination of natural and artificial light, like a table lamp or a string of fairy lights.
Finally, make your plushie display personal by adding your personal touches. This could be a handmade sign or a custom-made display case.
Displaying plushies can be a fun and creative way to show off your collection. By sorting and organizing your plushies, choosing a display method, creating a theme, adding lighting, and making it personal, you can create a visually pleasing display that will be enjoyed for years to come. Remember to have fun and get creative with your display, there’s no right or wrong way to do it.