How to Hang a Bedsheet from the Ceiling: A Step-by-Step Guide

Hanging a bed sheet from the ceiling can create a cozy and unique space in your home. Whether it’s for a reading nook, a play area for kids, or just a comfortable place to lounge, this DIY project is simple and affordable. In this guide, we’ll take you through the steps on how to hang a bedsheet from the ceiling with confidence.

Materials

  • Bed sheet
  • Dowel rod or curtain rod
  • Screw-in hooks
  • Drill and drill bits
  • Measuring tape

Step 1: Measure Your Space

The first step in hanging a bed sheet from the ceiling is to measure the space you want to hang it in. Measure the width and height of the area, and then add 6-12 inches to each measurement to account for draping.

Step 2: Choose Your Hardware

Next, choose the hardware you’ll need to hang your bed sheet. You’ll need a dowel rod or curtain rod, screw-in hooks, and a drill with drill bits. You’ll want to choose a dowel rod or curtain rod that is at least 6 inches longer than the width of your bed sheet.

Step 3: Install the Hardware

Using the measuring tape, mark the points on the ceiling where you want to install the screw-in hooks. Then, drill the screws into the ceiling at the marked points. Make sure the hooks are level and spaced evenly.

Step 4: Attach the Rod or Dowel

Attach the rod or dowel to the screw-in hooks, making sure it is level. If you’re using a curtain rod, you may need to install brackets to secure the rod to the hooks.

Step 5: Draping the Bed Sheet

Finally, drape the bed sheet over the rod or dowel and adjust it to your liking. You can use clips or pins to keep the sheet in place, or simply tuck the edges under the rod or dowel.

FAQ

Can I hang a heavy bed sheet from the ceiling?

Yes, you can hang a heavy bed sheet from the ceiling, but it’s important to make sure your hardware is sturdy and secure. You may need to use heavier-duty hardware, such as a thicker dowel rod or curtain rod, to support the weight of the bed sheet.

What is the best type of bed sheet to use for this project?

The best type of bed sheet to use for this project is a flat sheet, which is more flexible and drapes nicely. You can use a fitted sheet, but it may not drape as nicely and may require additional tucking and adjusting.

How do I clean a bed sheet that is hung from the ceiling?

To clean a bed sheet that is hung from the ceiling, simply remove it from the hardware, wash it according to the care instructions, and re-hang it when it’s dry.

Conclusion

With these simple steps, you can transform a plain room into a cozy and inviting space by hanging a bed sheet from your ceiling. This project is easy to customize and can be done in an afternoon with just a few basic tools and materials. Enjoy your new space.

The Ultimate Guide to Putting a Dresser in a Closet

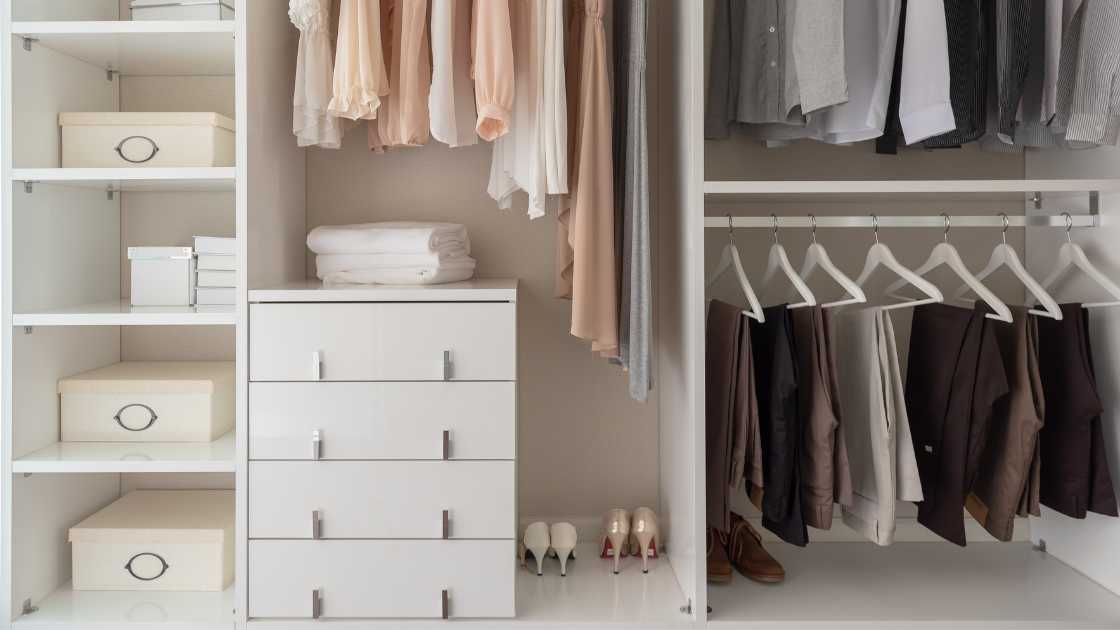
A dresser can be a great addition to a closet, providing extra storage space for clothing and other items. However, incorporating a dresser into a closet can be challenging, especially if the closet is small or oddly shaped. This guide will provide tips and tricks for putting a dresser in a closet, so you can make the most of your storage space.

Consider the Size of the Dresser and Closet

Before putting a dresser in a closet, it’s important to consider the size of the dresser and the closet. Make sure that the dresser will fit comfortably in the closet and won’t take up too much space, leaving room for other storage solutions. If the dresser is too large, consider downsizing or opting for a different storage solution.

Choose the Right Dresser for the Space

The type of dresser you choose will depend on the size and shape of your closet, as well as your storage needs. For small closets, a tall and narrow dresser may be the best option, while for larger closets, a wider dresser may be a better fit. Consider the number of drawers and the height of the dresser, as well as the material and finish, to find a dresser that works for your space.

Prepare the Closet for the Dresser

Before installing the dresser in the closet, it’s important to prepare the space. This may involve clearing out any existing storage solutions, as well as making any necessary repairs or modifications to the closet. It’s also a good idea to measure the space to ensure that the dresser will fit comfortably.

Install the Dresser in the Closet

Once the closet is prepared, it’s time to install the dresser. This may involve securing the dresser to the wall or floor or simply placing it in the closet. Depending on the size and weight of the dresser, it may be necessary to have a second person help with the installation.

Organize Your Closet with the Dresser

After installing the dresser, it’s time to organize your closet. Use the dresser to store clothing and other items, and consider using additional storage solutions, such as shelves or baskets, to maximize the space. Make sure to keep the dresser organized, so you can easily find what you need when you need it.

FAQ

Can you put a dresser inside a closet?

Yes, it is possible to put a dresser inside a closet. Doing so can provide extra storage space for clothing and other items, and can be a great solution for small or cluttered closets. However, it’s important to consider the size of the dresser and the closet, as well as any necessary modifications or preparations, before installing the dresser.

What is a dresser with a closet called?

A dresser with a closet is sometimes referred to as a “wardrobe dresser.” This type of dresser typically includes both drawers for storage and hanging space for clothing, making it a versatile and compact storage solution.

Do people put dressers in living rooms?

Yes, dressers are often used in living rooms for additional storage and organization. Dressers can be used to store items such as books, electronics, or decorative objects, and can help to declutter the living room and keep it organized. Some dressers are designed specifically for use in the living room, with finishes and styles that complement the décor of the room.

Conclusion

Putting a dresser in a closet can be a great way to add extra storage space and make the most of your closet. By considering the size and type of dresser, preparing the closet, and organizing the space, you can create a closet that works for your needs. With this ultimate guide, you’ll have all the tools you need to successfully incorporate a dresser into your closet.

The No Baseboard Look: How to Achieve the Modern Minimalist Look

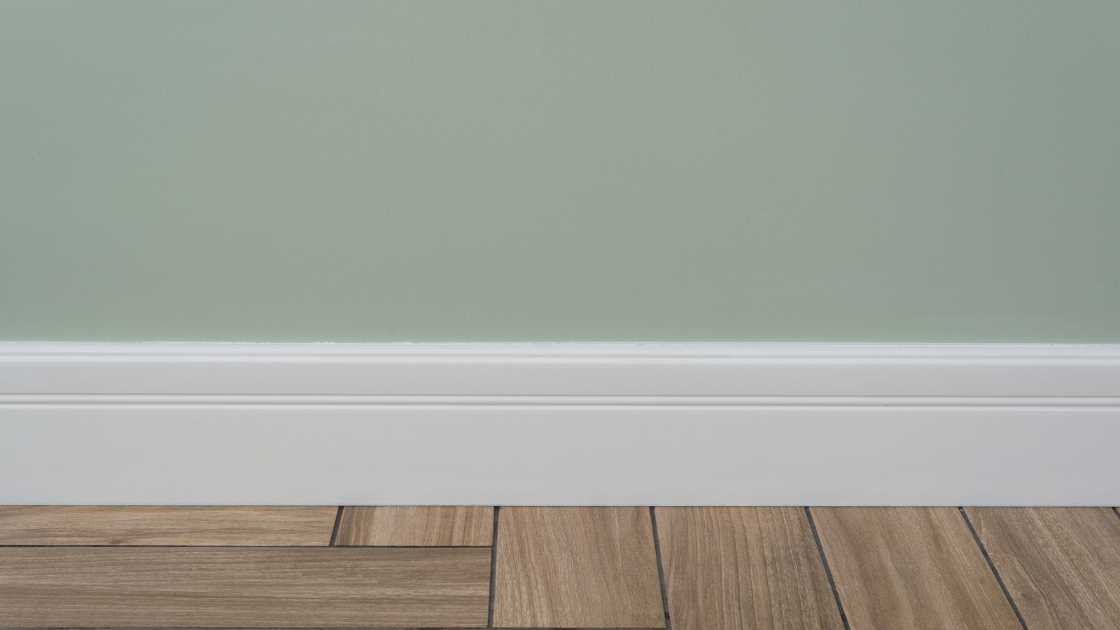
The no baseboard look is a popular trend in interior design that involves removing the baseboards in a room to create a more modern and minimal aesthetic. This look can be achieved in both new construction and renovation projects.

Benefits of the No Baseboard Look

There are several benefits to the no-baseboard look. One of the main benefits is that it creates a clean and uncluttered look. Removing baseboards can also make a room look larger and more spacious. Additionally, the no-baseboard look is easy to clean and maintain, making it a great option for those who want a low-maintenance home.

How to Achieve the No Baseboard Look

Achieving the no-baseboard look is relatively straightforward. The first step is to remove the existing baseboards. This can be done by prying them off with a crowbar or cutting them off with a saw. It’s important to be careful not to damage the walls or floors during this process.

Once the baseboards are removed, you’ll need to fill in any gaps or holes left behind. This can be done with wood filler or caulk. After the filler has dried, sand the area smoothly and paint or stain the walls and floors to match the existing color.

It’s important to note that removing baseboards can make a room look larger, but it can also change the way a room feels. If you’re considering removing baseboards, it’s a good idea to test the look by removing baseboards in a small area first, to make sure it’s the look you want.

FAQ

What can I use instead of baseboards?

There are several alternatives to traditional baseboards that can be used to achieve the no baseboard look. Some options include:

  • Using a quarter-round or shoe molding at the base of the walls instead of traditional baseboards
  • Using a flush baseboard that sits at the same height as the flooring, creates a seamless look
  • Using a chair rail or picture rail to add a decorative touch to the room without the use of traditional baseboards.

How to do no baseboard look?

The process of achieving the no baseboard look involves removing the existing baseboards, filling in any gaps or holes left behind with wood filler or caulk, sanding the area smoothly, and painting or staining the walls and floors to match the existing color. It’s important to be careful not to damage the walls or floors during the removal process, and to test the look by removing baseboards in a small area first before committing to the look.

Conclusion

The no baseboard look is a popular trend in interior design that can create a modern and minimal aesthetic. It’s a relatively easy look to achieve and can have several benefits, including a cleaner and more spacious look. However, it’s important to consider the impact it may have on the feel of the room before committing to the look.

Three Things to do to Make your House Move Less Stressful

Moving house is known to be stressful – here are three tips to help you reduce the stress of your house move…

Arrange the Right Help – Moving house is hard work and it is likely that you will need people to help you. This could be that you need somebody to take care of pets or children whilst the removals are happening or you might want help with the move itself. Book a professional like this removal company Cheltenham to make the day go easier and reduce how much you have to do.

Image Credit

Don’t Pack Everything – Although you want everything to go to your new home, you will want to make sure that you have some of the important things to hand straight away when you get there. Things to Keep with you include important documents like birth and marriage certificates, passports and driving licences, as well as any paperwork relevant to the house move. You should also have a bag of essentials that you can easily get for the first night in the new home, which can include things like toilet paper, bedding, soap and a change of clothes for everyone in the house.

Image Credit

Keep Calm – Moving is a stressful business and in the run  up to the move and the day itself, it is important to remember to take some time to keep calm. Practising calming breathing techniques or taking some time out to yourself can be really helpful if you are finding the whole process overwhelming at times.

Is BTL still a good investment?

In the UK, property has always been a favoured investment, whether as a home or as a Buy to Let (BLT) venture. Over the past few years, however, the financial landscape has changed and there are new implications such as changes in the tax regime for landlords and local authority charges to consider. So, is BTL still a good investment in 2023?

Image Credit

Here we will take a look at the new legislation, how your rental income is affected, and how getting a loan agreement has been impacted.

How buy to let mortgages work

Most investors will need to take out a buy-to-let mortgage to purchase a property to rent out, and there are different rules which apply to this kind of loan agreement.

First of all, the deposit required is normally 25%, but this can increase to 40% with some lenders, although some may require a smaller amount. Most borrowers take out an interest-only mortgage, paying the interest on the loan each month but not the full capital amount.

Many buyers will take out an ISA at the same time and use this to pay off the debt at the end of the mortgage, or sell the property.

You will need to contact a property lawyer to help with your purchase and more information can be found online, such as Parachute Law Loan agreement advice with further information also available.

What are the tax consequences of a buy to let property?

Firstly, there is an additional 3% of stamp duty to pay on a BTL property over and above the standard rate for property in England. This rises to 4% in Scotland.

Secondly, since 2020, buy to let landlords pay income tax on the whole of their rental income, regardless as to what interest they pay on their mortgage, meaning you can no longer use an offset against interest costs.

Image Credit

This has had a major effect on the economics of BTL for landlords. There is government guidance on how to work out your rental income and what level of tax you can expect to pay.

You may want to look at setting up a limited company since if you are in a higher tax bracket, you could be paying 40% on your rental income. By comparison, corporation tax is currently 19%. It would be worth seeking independent financial and legal advice to ensure that this is the right course of action in your circumstances.

Is Buy to Let still a good investment?

All investment involves an element of risk, but the history of UK property prices still makes the BTL market attractive.

Even given the tax changes, BTL can still offer a healthy income and return on your investment, especially since interest rates are still relatively low. You should be looking at a return of at least 8%, but this is definitely a long-term investment. Remember, however, that the income generated from rent is supplemented by the long-term capital growth in the value of the property.

DIY Guide: How to Display Plushies

Plushies, also known as stuffed animals or plush toys, are beloved by many for their soft, cuddly texture and adorable designs. They can bring back fond memories of childhood or serve as a reminder of a favorite character or series. However, displaying plushies in a stylish and organized way can be a challenge for many. In this guide, we will show you how to display plushies in a way that is both functional and visually pleasing.

Step 1: Sort and Organize Your Plushies

The first step in displaying your plushies is to sort and organize them. This will make it easier to decide on a display method and create a cohesive look. You can sort them by size, character, or theme. Once you have them sorted, take inventory of how many you have and what their size range is. This will help you to decide on the right display method.

Step 2: Choose a Display Method

There are several ways to display plushies, and the right method will depend on the size and number of plushies you have, as well as the space you have available. Some popular options include:

  • Shelves: Shelves are a great way to display plushies of all sizes. They can be placed on a wall or in a bookcase, and you can use different-sized shelves to create a layered look.
  • Hangers: Hangers are great for displaying plushies of a smaller size, like keychains or mini plushies. They can be hung on a wall or door using command hooks or a hanging organizer
  • Display cases: Display cases are perfect for keeping your plushies safe and dust-free. They can be found in different sizes and materials, like acrylic or glass.
  • Risers: Risers are great for displaying plushies of different sizes. They can be used to create a tiered look that adds visual interest.

Step 3: Create a Theme

Creating a theme for your plushie display can add a sense of cohesiveness and make it more visually pleasing. This can be as simple as choosing a color scheme or as elaborate as creating a scene from a favorite movie or book.

Step 4: Add Lighting

Lighting can enhance the look of your plushie display and make it more eye-catching. You can use a combination of natural and artificial light, like a table lamp or a string of fairy lights.

Step 5: Make it Personal

Finally, make your plushie display personal by adding your personal touches. This could be a handmade sign or a custom-made display case.

Conclusion

Displaying plushies can be a fun and creative way to show off your collection. By sorting and organizing your plushies, choosing a display method, creating a theme, adding lighting, and making it personal, you can create a visually pleasing display that will be enjoyed for years to come. Remember to have fun and get creative with your display, there’s no right or wrong way to do it.

One Way Curtains: A Guide to Installation and Maintenance

One way curtains, also known as privacy curtains or daytime privacy curtains, are a popular choice for homeowners looking to add a layer of privacy to their windows without sacrificing natural light. These curtains feature a special coating or fabric that allows light to pass through while blocking the view from outside. In this article, we’ll provide a guide to the installation and maintenance of one way curtains to help you make the most of this versatile window treatment.

Measuring for One Way Curtains

Before you begin the installation process, it’s important to properly measure your windows to ensure that your new curtains will fit perfectly. To measure for one way curtains, you’ll need to determine the width and length of the window, as well as the height at which you’d like the curtains to be hung. Be sure to measure the width of the window at three different points – the top, middle, and bottom – and use the smallest measurement to ensure a proper fit.

Installing One Way Curtains

Installing one way curtains is a relatively simple process that can be done with a few basic tools. First, you’ll need to attach the curtain rod to the wall or window frame using the hardware provided. Next, slide the curtain rings onto the rod, and then thread the curtains through the rings. Finally, adjust the curtains to your desired position and secure them in place.

Cleaning and Maintenance

One way curtains are easy to maintain and can be cleaned with a simple vacuum or a damp cloth. However, it’s important to check the care instructions for your specific curtains, as some materials may require more delicate treatment. To keep your curtains looking their best, avoid using harsh chemicals or bleach, and try to avoid exposing them to direct sunlight for extended periods of time.

FAQ

What curtains let light in but provide privacy?

Curtains that let light in but provide privacy are often referred to as “one way curtains” or “privacy curtains.” These curtains typically feature a special coating or fabric that allows light to pass through while blocking the view from outside. This can be achieved through the use of a sheer or semi-sheer fabric, or by applying a special coating to the fabric. Examples of such curtains are Sheer Curtains, Room darkening sheer curtains, Linen sheer curtains, Grommet sheer curtains and many others. These curtains are perfect for rooms where privacy is desired, but natural light is still desired, such as bedrooms, bathrooms, or living rooms.

Is it OK to put one curtain on a window?

It is perfectly fine to put one curtain on a window, it is a matter of personal preference. Some people prefer to have one curtain on a window for a minimalist or modern look, or because they want to let in as much natural light as possible. Others prefer to have two curtains for a more traditional or layered look, or for added privacy and insulation.

If you decide to use one curtain, it can be hung on its own, or with a valance or swag to add a decorative touch. You can also choose different types of curtain rods to create a unique look. Additionally, if you are looking for more privacy and light control, you can consider using a window film or a shade in addition to a single curtain.

Conclusion

One way curtains are a stylish and functional window treatment that can be easily installed and maintained. By following the tips outlined in this guide, you can ensure that your one way curtains will provide privacy and natural light for years to come.

Design Inspiration: Creative Ways to Incorporate a Bed Against Wall

When it comes to bedroom design, one of the most common dilemmas is how to make the most of a small space. One solution that is often overlooked is placing the bed against wall. Not only does this free up floor space, but it also allows for a variety of creative design options.

Built-In Headboard

One way to incorporate a bed against the wall is to create a built-in headboard. This can be done by constructing a wooden frame around the bed and then attaching shelves, drawers, or even a desk to the back. Not only does this save space, but it also provides additional storage and functionality.

Floating Nightstands

Another way to make the most of a bed against the wall is to use floating nightstands. These can be attached to the wall on either side of the bed, creating a sleek and modern look. This also allows for extra space on the floor, which can be used for a reading chair or additional storage.

Shelving

Shelving is another great way to incorporate a bed against the wall. By installing shelves above the bed, you can create a focal point and also have a place to store books, plants, and other decorative items. This is a great option for those who want to create a cozy and inviting bedroom.

Murphy Bed

A murphy bed is a type of bed that can be folded up into the wall when not in use, creating extra space. This is a great option for those who have a small bedroom and want to be able to use the space for other purposes during the day.

FAQ

Is it better to have your bed against a wall or in the middle?

There is no definitive answer to whether it is better to have your bed against a wall or in the middle of the room, as it largely depends on personal preference and the layout of the room. Having the bed against a wall can be a good option for small spaces, as it frees up floor space and allows for additional storage or functionality. It also allows for creative design options such as built-in headboards or floating nightstands. On the other hand, placing the bed in the middle of the room can create a feeling of spaciousness and openness in a larger room, and it allows for symmetry in the room. It also allows for easy access from all sides of the bed.

Why do people sleep against the wall?

There are several reasons why people may choose to sleep with their bed against a wall. Some of the most common reasons include: Space-saving, Safety, Privacy, Design, and Feng Shui.

Conclusion

Incorporating a bed against wall opens up a variety of creative design options. From built-in headboards to floating nightstands and murphy beds, there are many ways to make the most of a small space. With a little bit of inspiration, you can turn your bedroom into a stylish and functional retreat.

Why is There So Much Paperwork Involved in Buying a Property?

There are lots of things that need to be done when you buy a property and it can feel as if it is one lot of paperwork after another at times. However, the documentation and the legal side of buying a property is very important – it means that the ownership of the property and the deeds are transferred legally into your name, that surveys on the property can be done so that you know what you are buying and also to reduce the criminal activity which sometimes happened in the property market, not just in the UK but in other countries.

Image Credit

When you buy a house now, you will need to make sure that you can provide documentation. As well as confirming that you are who you say you are and that your address and other information is right (this is known as an AML ID check like this www.w2globaldata.com/regulatory-compliance-solutions-and-software/aml-id-checks ) you also will be asked to provide evidence of where the money to buy the property is actually coming from.

Image Credit

This is because buying a property is how many money launderers in the past would clean their money. Once the money was in property, it would be very difficult if not impossible for the authorities to trace where it had some from, meaning that these kinds of activities could often continue as there was no evidence that police could use to catch them.

Therefore, checks like this were put into place in order to stop money laundering and the associated problems that inevitably go along with it.