How to Personalise Your Rented Home

Add style and personality without breaking the bank – or your tenancy rules!

Image Credit

1. Walls

Some landlords might be laidback and allow you to freshen up the paintwork at your own expense. If this is the case, it’s best to choose light neutral shades, as there’s less chance the landlord will ask you to repaint when you move out, and they’ll maximise light and give a spacious airy feel.

Image Credit

If paint isn’t an option, don’t panic. Walls can be personalised with art works and photos. If you can’t use picture hooks, command strips are the perfect solution; just make sure to follow the instructions carefully to prevent damage. You could also use removable wall stickers to create interest and even give the illusion of wallpaper on a feature wall. Large mirrors don’t need to be wall-mounted either – prop one up to help reflect light and look decorative whilst still being functional.

2. Furniture

Your main pieces of furniture – bed, sofa, drawers – are all the same height, so consider mixing things up with pieces at different heights. Boltless shelving not only utilises wall space and storage options but is a great way to display the things you love and add character. Open shelving such as boltless shelving options are perfect for displaying your books, keepsakes and photos, or with baskets or boxes for storage.

3. Plants

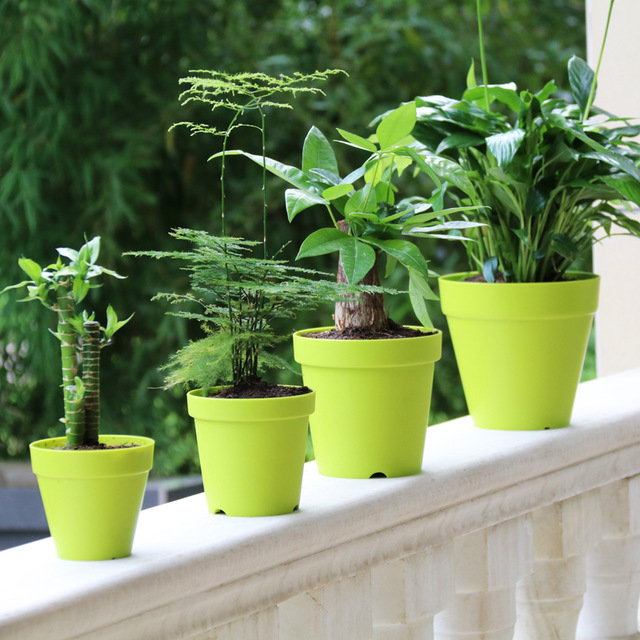
Plants are an easy way to bring life and colour to any space. Easy ones to look after are spider plants, aloe vera, rubber plants and even herbs. And if you aren’t green-fingered, there are some very realistic artificial plants that will look just as good. You can cluster different ones together on your boltless shelving unit for impact and have larger ones on the floor.

4. Textiles

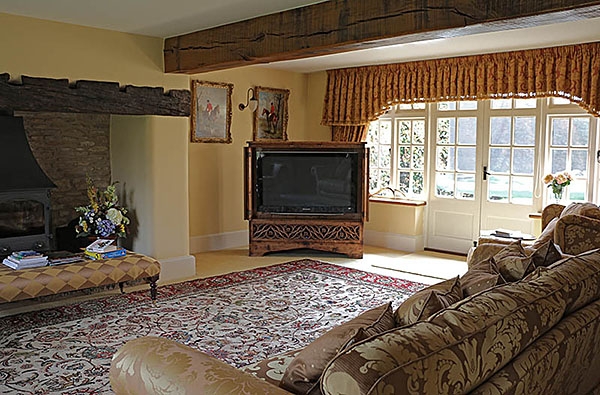
Inject colour and personality into your room with your soft furnishing. Rugs will add cosiness and texture, and an oversized one will really help to open up a small space. Adding cushions and a throw over the sofa or bed in contrasting colours and patterns will look great too.

5. Lighting

If you are able to replace the lightshades, this is a simple way to personalise your space (and can be taken with you when you leave). If changing them isn’t an option, you can add personal touches by combining tall floor lamps with smaller lamps at different heights.
Decorating your period home

Decorating the exterior of your home can instantly improve its appearance but it has other benefits as well, such as weather-proofing it. Decorating the interior of your property also helps you to make the most of any original features inside your period home.

Some period homes will be listed or in a protected conservation area and as such, will require you to seek advice before making any changes to the interior or exterior of your property.

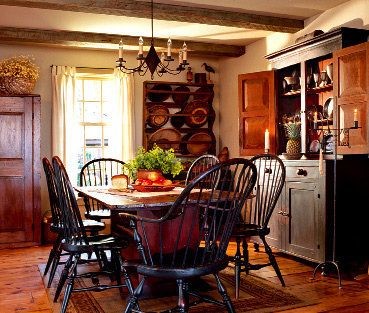
Decorating the external parts of your home can help protect it from decay and weather damage. This is especially important for exterior woodwork. Doors and windows will require regular painting to weatherproof them. An exception to this hardwood like oak which is better when unpainted. For a beautiful and authentic addition to your home, consider Bespoke Oak Frames from  http://www.bespoaktimberframes.co.uk

Image credit

For exteriors with stucco or lime render, a specialist paint that’s ‘breathable’ may be required. This type of paint effectively protects the substance but doesn’t trap moisture inside the walls thus avoiding damp.

It is not recommended to paint concrete, stone or brick walls as this can cause issues with damp. The paint of today is also almost impossible to remove without leaving damage to the walls. For brick or stone walls that are already painted, it’s advisable to seek professional advice.

For most homeowners, the colour you choose for your exterior is down to personal choice. Although period homes often benefit from sticking to traditional colouring. Listed properties will most likely need permission for any external redecoration if it would significantly alter the character of the original structure. Some conservation areas also have restrictions on the colours that can be used, so always check with your local authority first.

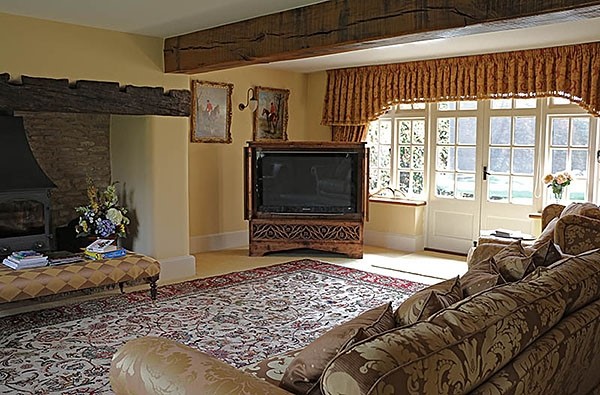
The decoration of the interior is also down to personal taste but living in a period property does bring with it some additional considerations. You might uncover traces of historic and fascinating earlier decoration. For example, the layers of old paint tell a story or there could be stunning wall paintings underneath earlier plaster, paint or wallpaper. You should find out whether they need to be kept and restored.

Image credit

For homes with historic wall decoration, it’s best to seek specialist advice before carrying out any redecoration. Removing layers of paint or lime plaster cans trip away layers of history that cannot be replaced. Stained or painted woodwork was the norm in historic properties and removing these finishes could be highly damaging to the original design feature.

When redecorating in a period property, it’s always best to work with the story and character of your home. Highlighting and making the most of original features will protect the integrity and beauty of your property. Features like panelling, cornices, timber mouldings and picture rails are all valuable and you would likely need to seek permission to remove them.

When is it time to replace your radiators?

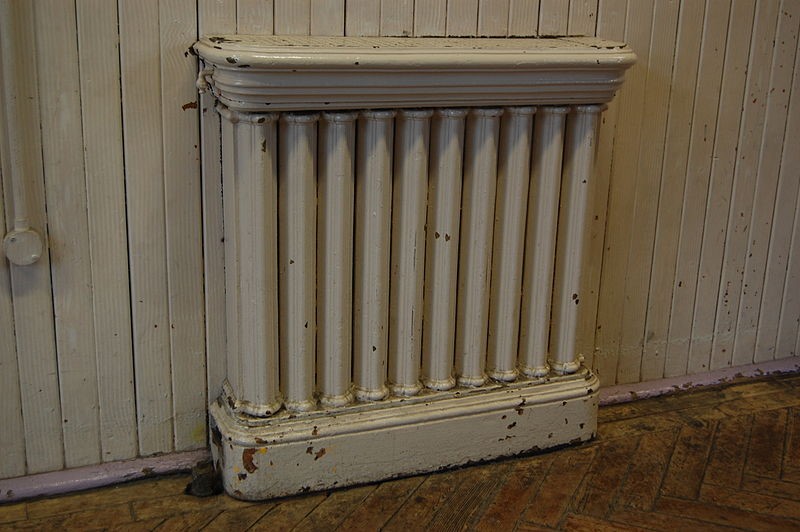
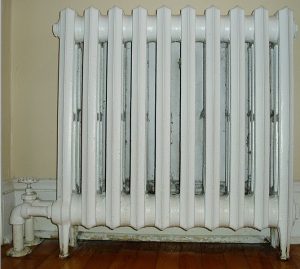
When did you last upgrade your heating system? If your radiators are around 10 years old, it may be time to invest in new ones. The average lifespan is usually somewhere between 8 and 12 years, and inefficient radiators can push up your energy costs without heating your home as well as they should.

replace your radiators

Image Credit

Unfortunately, your radiators start to corrode over time. This can cause them to fill with sludge that settles at the bottom of the radiator and causes cold spots and trapped air, which prevent your heating from working efficiently.

Is there anything you can do to keep your radiators working efficiently for a little longer? Try these steps before organising a complete overhaul of your heating system.

Extend the lifespan

Regular maintenance of the entire heating system can help to extend the life of your radiators. If you’re in Clifton or Stoke Bishop, organise your Bristol boiler service from a reliable company like https://www.bristolboilerservice.co.uk/. A heating engineer will be able to tell you if your radiators are beyond economic repair.

Ask about a power flush, which helps to clear out any sediment from the system. This can boost the overall efficiency of the system and will help to prolong the life of your radiators. However, a power flush should only be undertaken by a professional.

replace your radiators

Image Credit

One process you can try yourself is bleeding your radiators. This is a relatively straightforward procedure, and if you schedule it annually, it can help to remove any trapped air from the system and leave your radiators heating more evenly and efficiently.

Get energy efficient

If you have to replace your radiators, take the opportunity to install an energy-efficient system that will save you money in the long run. Radiator technology has significantly improved to the point where radiators have far longer lifespans and create a highly efficient system when combined with a modern boiler.

Not only do contemporary radiators function more efficiently, but they can add plenty of aesthetic flair to your interior decor. The choice of colours and configurations is endless, and these are radiators you’ll want to show off. Choose double-panel convector radiators to heat your interiors quickly and efficiently.

Don’t despair if your heating system needs an upgrade. Instead, think of the opportunities to save money and energy!

Why You Should Consider Using A Carpet Protectant

Many homeowners are under the impression that the key to having a long lasting carpet is to apply a protectant to the surface. A carpet protectant is designed to act as a repellant to liquid and increase stain and soil resistance.

Applying protectant to carpet can have multiple benefits and anyone seeking carpet cleaning glendale az, can have this type of protection added to their carpeting for an affordable cost.

Anyone considering putting in new carpet or trying to preserve the carpet that already exists would do well to have a carpet protectant applied . Here’s why:

Reasons to Apply Carpet Protectant

Carpet Protectant

The main reason for adding a protectant is to make it easier to clean up spills and accidents. This surface protector adheres to the fibers and acts a protective barrier so liquids take longer to soak in and potentially create a lasting stain.

But it’s not just liquids either, dry substances such as dust and dirt are also prevented from getting deep down into the pile of the carpet and resting on top of the backing material, where it’s much tougher to remove such contaminants.

This is not to suggest that a carpet protectant is intended to act an an impenetrable shield to keep your carpet pristine and free of imperfections. You still need to practice routine maintenance in the form of vacuuming and deep cleaning.

Another useful benefit of carpet protectant is that your carpet can ward off common wear and tear through excessive levels of foot traffic. Stains aren’t just left behind after spills and messes, even typical daily wear can result in stains and discoloration.

Applying Carpet Protectant

Carpet Protectant

For homeowners with new carpets having been installed, a protectant has already been applied. In fact, most new carpets will come equipped with a protective barrier, meaning you won’t need to have another one added to the fibers for the first four or five years of ownership.

It’s only after that initial time period when you’ll need to consider having a protectant reapplied to your carpet after 18-24 months. That’s because it can wear off over time under routine foot traffic. Those areas that see a particularly excessive amount of wear and tear will likely have the protectant almost non-existent in a shorter period of time.

You may also need to reapply the protectant in these spots more often than the recommended 18-24 months in order to keep the carpet safe and sound.

Doing the Work

Many homeowners may attempt to apply a protectant to the carpet themselves but even with the many assorted protectants that are currently available, the smart choice is to leave this kind of work to a trained professional.

Not only will you feel assured that the job was done correctly and thoroughly, but you can safeguard your investment for the long term. So leave the work to those who know what they’re doing and all you need to do is practice good carpet maintenance as you would even if there was no protectant applied to the fibers at all.

What To Do When Your Home Is Heated Unevenly

Heating your home properly is something you may not always think about, until there’s something preventing that from occurring. When you detect an issue of some kind, you may have a hard time trying to determine what the problem might be.

Unfortunately, that can be tougher to do than you think as uneven heating is a problem that comes with multiple potential causes. The good news is that once you do identify the culprit, the solution for fixing the problem is typically quite simple.

So the next time you are having a problem with your heating and cooling cleveland, these are the parts of the system you’ll want to analyze and diagnose first.

The Vents

Most HVAC systems operate by distributing heated or cooled air throughout the home via a network of ducts that lead to vents where your climate-controlled air enters a room. But if those vents are closed, the air can’t very well get into the room.

So if you detect that your home is just not heating very evenly, you’ll want to take a look at your vents. There could be a couple of solutions to this problem, the first being the most obvious in whether your vent is open or shut. If shut, simply open it up.

If it’s open, you could be dealing with a clogged or dirty vent. You may also want to check if any furniture is blocking the vent and preventing the heat from getting into the room. Dirty vents should be cleaned or unclogged, a blocked vent should have any obstacles cleared away.

Leaking Ducts

Warm air can only enter the room if it’s properly directed to the vent. If your vent isn’t clogged or blocked or closed, you may need to check the condition of the ductwork. Uneven heating can often be a symptom of a duct that is leaking. This is something that occurs in older ductwork and it’s not uncommon to have your air leaking out.

That can reduce the amount of heated air that enters the room, making for a costly and chilly situation. If you suspect you may have leak in your ducts, you will need to have a professional technician to come out and diagnose the problem.

Your Thermostat

Heated Unevenly

There’s a big difference between having your thermostat switched to the “on” position and the “auto” position. So if you feel like there’s uneven heating throughout your home, you may need to just set the switch in the proper position.

Having the thermostat switched to “on” will keep the fans blowing air after the heating mechanism of the system is no longer running. But “auto” will move that warm air through the ductwork when the heating mechanism is operating and actively producing heated air.

Adjusting the switch to one position over another can also be easier on your energy bills since running your heat longer can impact your costs. The thermostat is a major component of your HVAC system, therefore it’s important to check there to see if that’s where your heating issues have originated.

Protect Your Heating System From Ice And Snow

Heating System

Your heating system is there to keep you warm even in the dead of winter. Unfortunately, your system itself might need a bit of protection when storm season hits. When it comes to heating your home properly, you always want to protect the external parts of your system from contact with ice, sleet, and snowfall. Don’t end up frantically calling a new heating installation annapolis just because your heater went on the fritz during a blizzard. To protect your heating system and your home, try these tips for keeping your system protected from the bad weather.

Use the Defrost Cycle

If you use a heat pump to heat and cool your home, you’re using the natural heat from the earth to filter into your house and create a warm, cozy environment. This heating method, however, comes with its own problems. Because your pump uses the ground as a heat source, it’s exposed to harmful outside elements like snow and ice. If you live in a place that’s known for its tough winters, you’re definitely going to be dealing with this issue sooner rather than later. In addition to keeping an eye on your pump each day to make sure it’s not suffering from any external damage, you should turn on the defrost cycle to make sure you don’t deal with a ton of buildup after a storm or a bout of icy rain. The defrost setting should be found on your thermostat. Once it’s initiated, your pump will go through a self-heating process that allows the outer coil to melt off any snow or ice buildup.

Manually Remove Debris

If you’re not sure how to use the defrost cycle or you simply don’t feel like there’s enough snow and ice to necessitate it, you can always check on your pump to see if you can manually remove snow and ice. While it might seem tedious to go out and check on your pump each day, it’s what every homeowner should be doing during the winter, as well as checking the gutters, drains, and roof to make sure nothing has been damaged by a recent storm or snowfall. If you’re noticing a buildup of ice and dirt, using a pick or a blunt tool to remove it could provide an easy fix. For more stubborn ice buildup, using steam or hot water to defrost the outer coil could also work. Even when the weather isn’t wintry, getting in the habit of checking and cleaning off your outer coil is a smart move if you want your heating system to last.

Call a Technician

If your defrost cycle isn’t working or you’re coming up against other issues with your heat pump, don’t try to fix them on your own. Instead, call a technician to take a look at the situation before it gets too crazy. You don’t want to wait through the whole winter to find out that your pump has suffered irrevocable damage due to being encased in ice. You also don’t want your heating system to suffer during the coldest winter months due to something you could easily get fixed.

What Is A Landscape Design Theme?

Landscape design refers to the arrangement of various attributes found in a backyard, a park, any area that can be refined and modified for both practical and aesthetic objectives. The art of landscape design (and it is just as much of an art as it is a functional component for beautifying your home or any outdoor space) incorporates an assorted variety of conceptual facets that are geared toward affecting the visual perception of a landscape.

These concepts work in concert with one another so as to create a visually dynamic and engaging perception for the viewer. This is accomplished by first placing an importance on the concept of harmony in your design, whereas a theme is chosen and conveyed in a uniform manner throughout the entire landscape.

Achieving Harmony

Such a thing could be implemented in any number of ways, whether it means utilizing one dominant color or creating repetitive aspects over the entire landscape. But harmony will only work if you also incorporate a sense of balance and proportion. When harmony is attained in the aesthetics and functionality of a landscape it means that the eye of the viewer detects that all the pieces now fit together in the service of conveying a distinct and apparent thematic approach.

Balance refers to a juxtaposition of two sectors of the landscape which works alongside the concept of proportion in restoring harmony to the area. For there to be proper proportion in any landscape, the sizes of the various components or the sizes of collections of these components bunched together must fit when compared to one another.

Having one component be massive largely in relation to the other components around it can throw your harmony off balance and allow that one component to dominate your eyeline. When all the elements of your landscape are proportioned in relation to each other, it achieves a more successful sense of balance and harmony across your full landscape.

Landscape Design is Fluid

There is no hard and fast rule to creating the ideal landscape design. That’s because it can be achieved in many different facets that suit the taste of the individual. Not everyone likes the same kind of greenery around their home or in a public park.

Designers work to create their vision based upon their own personal preferences and/or those of the individuals for whom they are doing this type of work. But a landscape designer may be hired for his or her affinity to a certain type of aesthetic or because they are known for working with a specific type of plant or shrubbery.

But to suggest there is only one way to craft landscape design is incorrect. There are many acceptable solutions to designing a landscape and while there may be certain designs that many might agree are “better” or “worse” than others, it all really comes down to the person for whom the design is being developed and executed. Some designers may want to use Pete Rose mulch in their overall aesthetic, others may not want to use mulch at all.

Landscape design themes truly supports the old adage that “beauty is in the eye of the beholder”.

How To Clean And Revive An Old Wood Fence

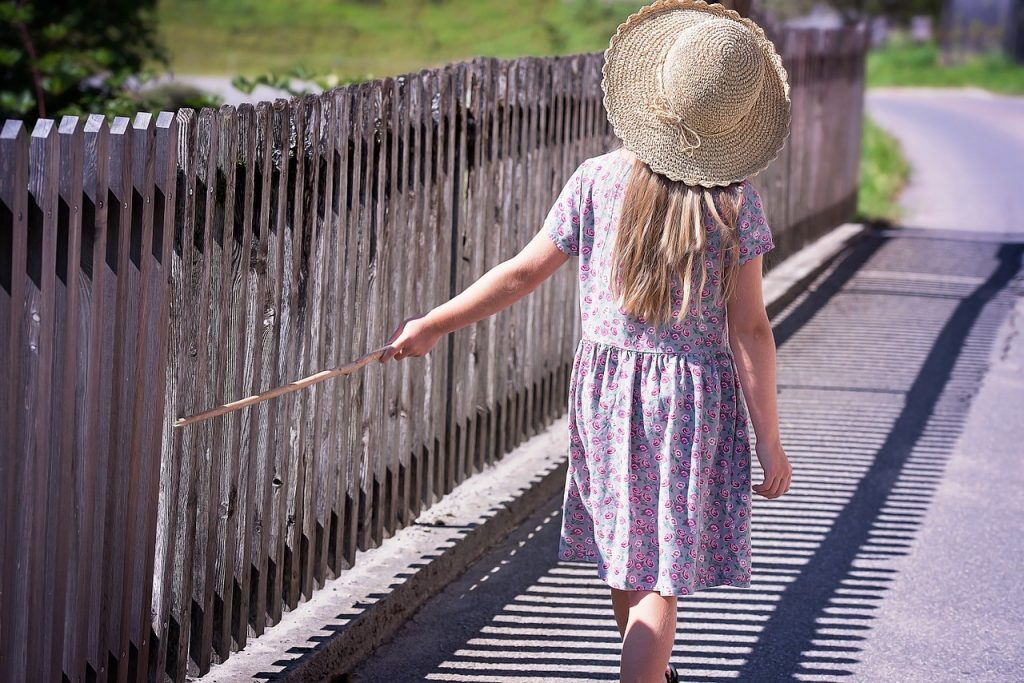
One of the benefits of having a wood fence is that you very rarely reach a point where your materials need to be totally replaced. While it might not be difficult to clean a wood fence, many homeowners find themselves letting this task slip, resulting in a dirty, worn-down fence that looks far from brand new. Luckily, there’s an easy way to spruce up any old fence without spending lots of time and money on the project. If you use a Fence Staining Londonberry facility, you’re already investing in a better, brighter look for your fence. If you want to take a DIY approach, here’s what you should do.

Clean

Before you do anything, you’re going to have to make sure your fence is as clean as it can be. If you’re working with a smaller damaged area, you might be able to do this using only a few tools over the course of an afternoon. For larger fences or seriously dirty or damaged areas, however, it might take something a bit more powerful. Consider hiring a pressure washing company to help clean off your fence before starting work on the restoration. If you have previous experience with power washing, you could take on the job yourself, as long as you’re extremely careful and start on a low setting. There’s no point in putting a new stain over a dirty fence, and cleaning it off will allow you get a better look at what parts are dealing with severe damage and what parts just need a bit of sanding.

Treat

Once you’ve cleaned, it’s time to treat. Now that your fence is fully washed off, you can get a sense of what condition your wood is in. If you’re seeing signs of mold or mildew even after your pressure washing session, figure out whether you can sand off the damaged parts or if you need to completely replace a few pieces of wood. After everything is in the best condition it can possibly be, it’s time to start prepping your wood for staining.

Condition

Before you apply your stain, you’ll want to add a layer of wood conditioner. This substance is exactly what it sounds like. Before you add a new layer of stain or paint, it’s important to have your wood primed and ready. A wood conditioner helps make sure your wood is as healthy and strong as it can be before you apply a shiny new coat of stain. While you can technically go without it, it’s a simple extra step to take on if you want your fence’s makeover to look better for longer.

Stain

Finally, you can apply your stain. Most wood stains range from golden amber hues to darker mahogany and cherry shades. The color of your stain is up to you, but it’s generally a good idea to work with the natural color of the wood rather than trying to apply a stain that’s conspicuously lighter or darker. Apply two even coats, and let dry. Once everything is set, you’ll be looking at a fence that looks brand-new and almost completely blemish-free.

Where Can You Buy Pots and Planters

The planters should first of all facilitate the care of the outdoor and indoor plants. For example, many times especially when watering or fertilizing plants, the optimum amount of water or fertilizer that plants need is very difficult to calculate, when often the surplus water from the water cannot be taken by the soil and it is leave the plant invading the flowerpot. In the same way, when we fertilize the plants, the soil or the substrate sometimes falls next to the plants and the pots precisely prevent the shelf or sill where the plants are placed from getting dirty.

While there are an infinity of models and designs of flowerpots on Getpotted.com, it is common that one wonders if there is an alternative to not use a flowerpot. The problem is that you do not want to always have to buy two pots for the care of plants, a pot and a flowerpot, understanding the pot as the pot where we put the plant and the pot what we use as pots or flower pot covers.

Especially outdoors, as in the plants that we place on the balcony or terrace, there is no real need to have to use a flowerpot to house the pots. Most of the time in outdoor areas the plants are usually planted directly in planters, which are already prepared to store the surplus irrigation water in a lower water tank so that the water does not leak out.

The most important thing to keep in mind when buying pots is nothing more or less than choosing the right size. The pots have to fit inside perfectly so that the pots can perform their function in the best possible way. If we want to buy planters garden centre for plants that we already have, we have to take into account the height and width of the plants.

For this, it is best to measure the pots well at home and avoid unpleasant surprises after the purchase of the pot. Anyone who wants to be 100% sure, just have to measure the height as well as the diameter of the pot, both at the base and at the top, because some pots have a base considerably narrower than the opening. For other forms of planters we must also measure the height and length and width of the sides. In general, the planters should be four centimeters wider and taller than pots and pots, in order to protect the countertops from water and dirt from the plants.

The most common materials in the manufacture of pots are ceramic or porcelain, but we can also find flower pots made of plastic, glass, clay, mud, wicker or some types of special woods.

The more unusual and striking the flowerpot is, the more it will attract the attention of our visitors and it will become another element of the decoration of our house. Whoever is married to the simple and discreet flower pots, can choose between pots rich in ornamentation or even pots that are an object of decoration itself.

As is logical, apart from the material, there is also a great variety of pots of different colors. Also, if we want to break with the prevailing style in our house, we can choose a flowerpot made of a totally different material. For all this the flowerpots are not only functional, but also fun and colorful.

Your Stain Removal Guide For Carpet

Homeowners who put a lot of time and money into purchasing long lasting carpet are always at risk of having that carpet ruined by any number of potential risks that can lead to stains. It could be spilled juice, a wine glass knocked over, even a pet that might have an accident in the house, all of these things can have a detrimental impact on the look, feel, even the smell of your carpet.

But the good news is that even the toughest stains can be removed, as long as you take the appropriate steps towards prevention and, should that ultimately fail, know what to do to lift the stain and remove it entirely.

We’re going to cover both in this guide for removing stains from your carpet. Each one has a role to play in keeping your carpet in the best shape possible. You don’t need to let stains ruin your expensive floor covering, you can take the necessary precautions and restorative actions to ensure your carpet is always at its best.

Spot Cleaning

The best way to keep stains off your carpeting is to prevent them from setting in the first place. That means getting at spills and messes instantaneously, the second they hit the surface of the fibers. You don’t have a moment to lose, the longer you allow liquids, substances, or solids to remain on your carpet, the more likely a stain will set and remain there until you take further action.

The trick is to absorb as much excess moisture as you can so as to prevent it from wicking into the carpet and damaging the fibers. Once you have picked up as much of the mess as possible, you can apply a cleanser to the spot and clean it thoroughly.

Blot, Don’t Wipe up The Spill

Blotting or rubbing. Which is best? The answer is blotting. It’s the first thing to remember when you’re picking up any spill or mess from a carpet. Gentle blotting will absorb the moisture and keep it from soaking into the fibers or backing material.

This is very important to help keep from letting the stain set in. Rubbing or wiping will only drive the mess deeper into the pile of the carpet and assist the stain in setting. You want to avoid this at all costs, of course.

Removing Stains

Whatever the stain, there’s a way to remove it. But some stains are easier to eradicate than others, while some can be extremely stubborn. It’s true that you can’t get out all stains entirely, that depends on what it is you’ve spilled and how long you’ve allowed it to remain.

But the only way to find out whether or not you can lift the stain is to try first. That often requires you to flush the stain to help dilute and eventually remove it. This technique may work with red wine, fruit juices, even blood, and other tough stains.

All you need is a little warm water or club soda, either one can prove successful but be careful when you try to flush that stain. Too much moisture can get trapped beneath the carpet and cause moisture-related issues like mold or mildew to emerge. If this happens, you could be forced to remove the carpet entirely.

Flush the stain but be careful about using too much, don’t saturate the carpet.

Now what about the liquid or substance that’s been spilled? Surely there are special instructions you should follow to lift certain types of stains out of your carpet. Here are just some of the most common messes and how you should deal with them:

Nail Polish

This one is pretty simple. Instead of using water or club soda as mentioned above, apply some nail polish remover to the area and then blot gently until the stain comes out.

Dog/Cat Urine

After you’ve blotted the area dry and picked up as much of the urine as possible, you need to eradicate both the stain and the smell from the carpet. To do that, mix equal parts white vinegar and water to the area. After that, use a half teaspoon of clear detergent (no bleach included) mixed with about 32 ounces of water and rinse the area clean. Blot the moisture to keep it from soaking through the backing material.

Stubborn Stains

For those stains that just won’t lift no matter how much flushing and application of mixtures you try, it’ may be time to call your local Five-Star Chem-Dry to let the professionals come in and use their heavy-duty equipment and cleansers to lift those stains right out of your carpet fibers.