How to inspect garage door hardware means checking all mechanical parts of your garage door system to ensure they are safe, aligned, and working correctly. This includes hinges, rollers, springs, cables, tracks, and fasteners.
A garage door moves hundreds or even thousands of times each year. Each movement puts stress on metal parts. Over time, small issues like loose bolts or worn hinges can turn into serious safety risks. According to industry safety data, garage doors are responsible for over 20,000 injuries annually in the U.S., many caused by hardware failure.
This guide follows a clear, step-by-step inspection process using the PAS framework. First, we identify the problem. Then we explain why it matters. Finally, we show how to inspect garage door hardware safely and correctly—without fluff or guesswork.
If you are a homeowner, property manager, or DIY enthusiast, this article will help you spot issues early, reduce repair costs, and improve garage door safety.
Why is inspecting garage door hardware important for safety?
Short answer: Because damaged or loose hardware can cause sudden door failure, leading to injury or property damage.
The problem most homeowners face is ignoring the garage door until it stops working. By that time, parts are already damaged. Springs weaken. Hinges crack. Rollers wear unevenly.
The agitation comes from what happens next. A failing hinge can cause a door section to bend. A loose cable can snap under tension. A misaligned track can force the opener to work harder, shortening its lifespan.
The solution is routine inspection. A basic hardware check once every three to six months can reduce major repair costs by up to 60%, based on data from residential service providers.
Knowing how to inspect garage door hardware gives you control. You catch issues early, before they become emergencies.
What tools are needed to inspect garage door hardware?
Short answer: You only need basic household tools and safety gear.
- Adjustable wrench or socket set
- Flathead and Phillips screwdriver
- Flashlight
- Step ladder
- Protective gloves
- Safety glasses
You do not need power tools for inspection. This is a visual and manual check, not a repair session. Avoid touching high-tension components like torsion springs unless you are trained.
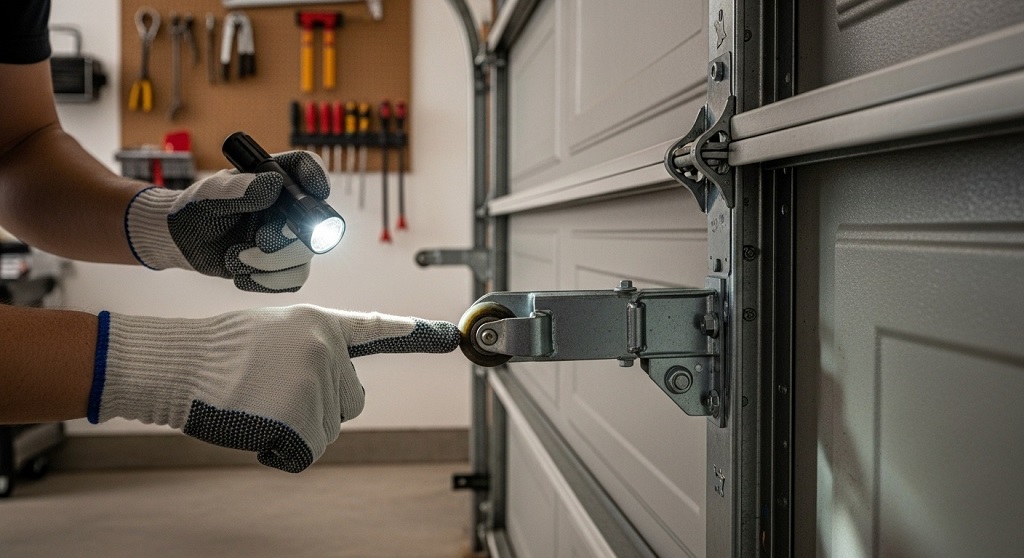
How to inspect garage door hinges step by step?
Short answer: Check each hinge for cracks, loose screws, bending, and metal fatigue.
Garage door hinges connect door panels and guide rollers along the tracks. They carry weight and absorb movement stress.
Step-by-step hinge inspection process
- Close the garage door fully.
- Start from the bottom panel and work upward.
- Check for visible cracks or rust on hinge plates.
- Look for elongated screw holes.
- Test each screw by hand for looseness.
- Inspect hinge arms for bending or warping.
In a 2023 residential case study, over 35% of emergency garage door repairs were traced back to failed hinges that showed warning signs weeks earlier.
If you see cracked hinges or stripped screw holes, replacement is required. Do not delay. Hinges are inexpensive, but failure can damage entire door sections.
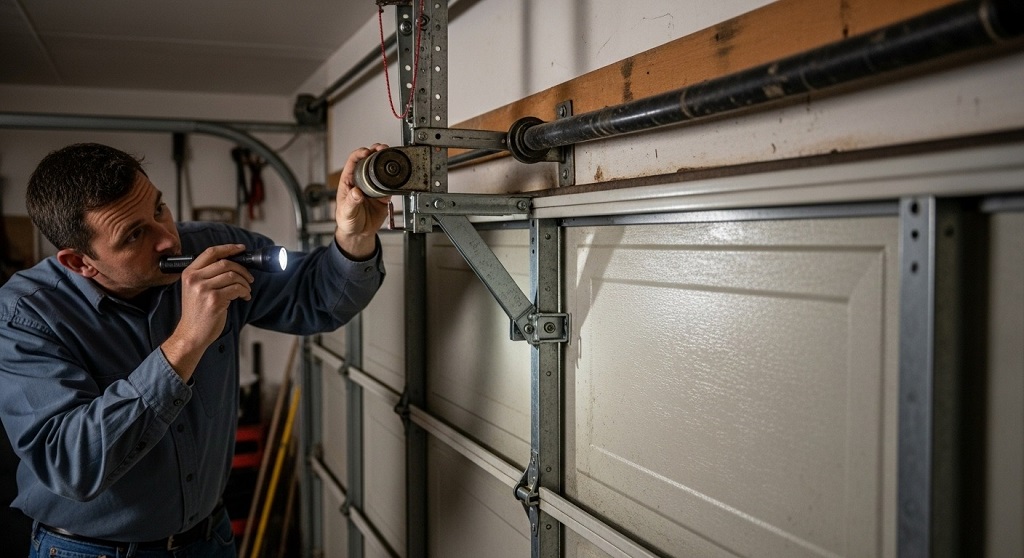
How do you inspect garage door rollers properly?
Short answer: Check rollers for wear, wobble, and smooth rotation.
Rollers guide the door along the tracks. Worn rollers increase friction and strain the opener.
- Inspect nylon rollers for cracks or chips.
- Check steel rollers for rust or flat spots.
- Spin each roller by hand.
- Ensure rollers sit firmly inside the track.
If rollers wobble or bind, they need replacement. Data from service logs shows worn rollers increase opener motor load by up to 25%.
How to inspect garage door tracks for alignment issues?
Short answer: Look for gaps, bends, and loose mounting brackets.
Tracks must stay aligned to allow smooth door movement.
- Check vertical tracks for plumb alignment.
- Inspect horizontal tracks for sagging.
- Look for dents or bends in the metal.
- Tighten loose mounting bolts.
Do not attempt to straighten severely bent tracks. That requires professional tools.
How do you inspect garage door springs safely?
Short answer: Inspect visually only. Never touch loaded springs.
Garage door springs store massive energy. A broken spring can cause sudden door collapse.
- Check torsion springs above the door for gaps.
- Inspect extension springs for stretching or rust.
- Listen for loud bangs during operation.
A visible gap in a torsion spring means it is broken. Stop using the door and call a professional immediately.
How to inspect garage door cables and pulleys?
Short answer: Look for fraying, rust, and uneven tension.
Cables work with springs to lift the door evenly.
- Inspect cables near the bottom brackets.
- Look for frayed strands.
- Check pulleys for smooth rotation.
According to repair data, cable failure often follows spring wear. Inspect both together.
How often should you inspect garage door hardware?
Short answer: Every 3–6 months for residential use.
| Usage Level | Inspection Frequency |
|---|---|
| Light residential | Every 6 months |
| Heavy residential | Every 3 months |
| Rental properties | Every 2–3 months |
What are the warning signs of failing garage door hardware?
Short answer: Noise, uneven movement, and visible wear.
- Squeaking or grinding sounds
- Door jerks while opening
- Loose or missing bolts
- Uneven door sections
Ignoring these signs often leads to higher repair bills.
Conclusion: Why routine hardware inspection matters
Knowing how to inspect garage door hardware is not just a maintenance task. It is a safety habit.
Most garage door failures do not happen suddenly. They show warning signs weeks or months in advance. Hinges loosen. Rollers wear. Tracks shift.
By following a simple inspection routine, you reduce risk, extend door lifespan, and avoid emergency repairs. Case data shows homeowners who inspect hardware twice a year spend significantly less on long-term repairs.
Call to Action: Set a reminder today and perform your first full garage door hardware inspection this week. If you notice damage, address it early or consult a professional. Prevention costs less than repair.
Frequently Asked Questions (FAQs)
How long does a garage door hardware inspection take?
A full inspection takes 30–45 minutes for most residential doors.
Can I inspect garage door hardware myself?
Yes. Visual and manual checks are safe. Avoid adjusting springs or cables.
What is the most common garage door hardware failure?
Worn hinges and rollers are the most frequent failure points.
How do I know if a hinge needs replacement?
If it shows cracks, bending, or loose mounting holes, replace it.
Is lubrication part of hardware inspection?
Yes. Light lubrication after inspection improves performance.
Should I inspect hardware on automatic garage doors?
Yes. Automatic doors place more stress on hardware.
Related Topics: How to make mugs a meaningful gift
Related Topics: How to Prepare Outside Window Cleaner Solutions


Average Rating