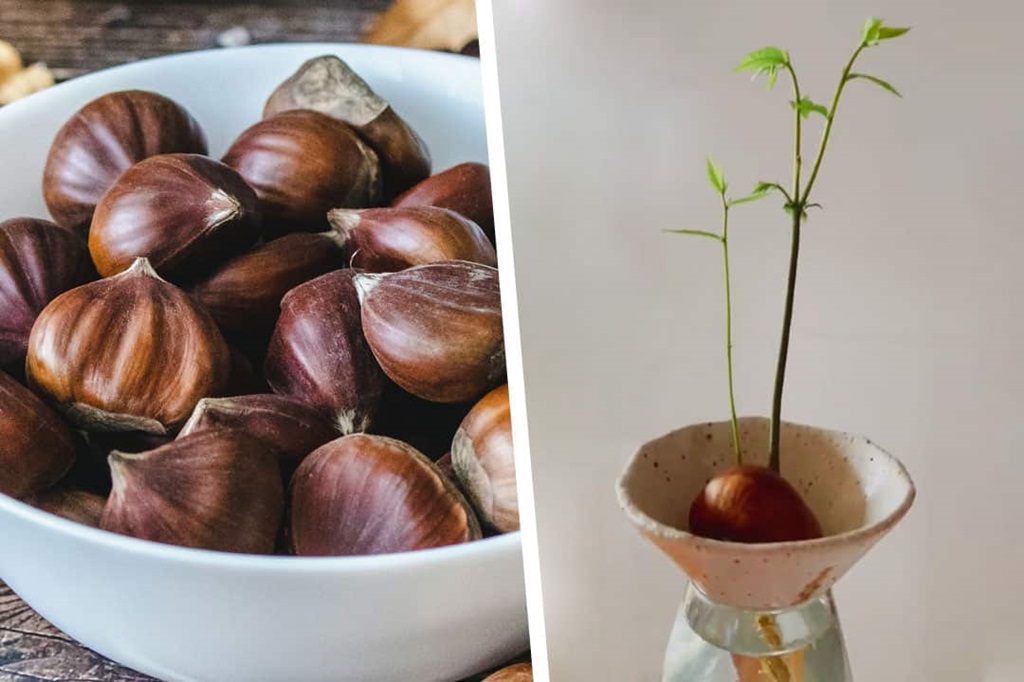
Growing a chestnut tree from a chestnut is an exciting and rewarding endeavor. Not only do chestnut trees provide delicious nuts, but they also enhance your landscape with their beautiful foliage and sturdy presence. In this guide, we will explore the steps needed to grow a chestnut tree, dive into the benefits of doing so, and share tips that make the process easier and more enjoyable. Whether you’re a seasoned gardener or a beginner, you can successfully grow a chestnut tree from a nut with the right knowledge and approach.
The Appeal of Chestnut Trees
Before diving into the process, let’s take a moment to appreciate why chestnut trees are so appealing. Chestnut trees are known for their large, attractive leaves and can grow up to 100 feet tall, making them excellent shade providers. They produce edible nuts, which can be roasted or used in various recipes. Furthermore, chestnuts are a great source of nutrients, including vitamin C and fiber.
From an environmental perspective, chestnut trees contribute to biodiversity and can be a habitat for various wildlife. They are also known for their ability to improve soil quality. According to the Arbor Day Foundation, trees like chestnuts can absorb carbon dioxide, which helps combat climate change.
When you grow a chestnut tree from a chestnut, you are not only investing in your garden but also participating in a larger ecological effort. Now that we’ve established the appeal, let’s jump into how to grow your very own chestnut tree!
Step 1: Choosing the Right Chestnut
To grow a chestnut tree, you need to start with quality seeds. Not all chestnuts are suitable for planting, so it’s important to choose the right type. There are several species of chestnuts, but the most common for cultivation are the American chestnut (Castanea dentata), European chestnut (Castanea sativa), and Chinese chestnut (Castanea mollissima). Each species has its unique characteristics and benefits.
American chestnuts were once predominant in North America but faced near extinction due to a blight. Today, efforts are underway to restore this tree, so planting American chestnuts can help revive a part of our natural heritage. European and Chinese chestnuts are more resistant to blight and are often preferred for nut production.
When selecting chestnuts, look for those that are firm and free of blemishes or mold. Avoid nuts that feel light or have holes, as these may be infested or dried out. You can purchase quality chestnuts from local nurseries, garden centers, or reputable online suppliers.
To learn more about gardening and landscaping, explore Hatchettgardendesign blog, where you’ll find tips and ideas that can enhance your gardening experience.
Step 2: Preparing for Germination
Once you’ve chosen your chestnuts, it’s time to prepare for germination. Chestnuts require a specific process to sprout, which involves cold stratification. This mimics the natural winter conditions that seeds would experience outdoors. Here’s how to prepare your chestnuts for germination:
- Soak the Chestnuts: Start by soaking the chestnuts in water for 24 hours. This helps to soften the outer shell and can improve germination rates.
- Cold Stratification: After soaking, place the chestnuts in a damp paper towel or peat moss, then put them in a sealed plastic bag. Store the bag in the refrigerator for about 30 to 60 days. This period mimics the natural winter conditions that chestnuts need to germinate.
- Check for Germination: After the cold stratification period, check the chestnuts for signs of germination. Look for small roots emerging from the nut. If you see roots, it’s time to plant!
Step 3: Planting Your Germinated Chestnuts
Once your chestnuts have germinated, it’s time to plant them in soil. Follow these steps for successful planting:
- Select a Planting Location: Choose a sunny spot in your garden or yard. Chestnut trees thrive in full sun, needing at least six hours of direct sunlight each day.
- Prepare the Soil: Chestnuts prefer well-draining soil that is slightly acidic to neutral (pH 5.5 to 7.0). You can improve soil quality by adding organic matter such as compost or well-rotted manure.
- Plant the Chestnuts: Dig a hole that is about 2 inches deep. Place the germinated chestnut in the hole with the root pointing downward. Cover it with soil and gently pat it down. Be careful not to compact the soil too much, as this can hinder root growth.
- Watering: Water the newly planted chestnut thoroughly to help settle the soil around the roots. Keep the soil moist but not soggy, as chestnuts do not like to sit in water.
Related: Expert Advice: Timing Your Fruit Planting for a Bumper Crop
Step 4: Caring for Your Chestnut Tree
Once your chestnut tree is planted, it requires proper care to thrive. Here are some essential tips for maintaining your tree:
Watering and Mulching
Consistent moisture is crucial, especially in the first few years of growth. Water your tree regularly, particularly during dry spells. Applying a layer of mulch around the base of the tree helps retain soil moisture and suppress weeds.
Fertilization
Chestnut trees typically benefit from a balanced fertilizer in early spring. This can promote healthy growth and nut production. A slow-release fertilizer is ideal, as it provides nutrients over an extended period.
Pruning
Pruning is essential for maintaining the health and shape of your chestnut tree. Remove any dead or diseased branches and shape the tree to encourage a strong central leader. Pruning should be done during the tree’s dormant season, typically in late winter or early spring.
Step 5: Dealing with Pests and Diseases
Like all plants, chestnut trees can face challenges from garden pests and diseases. Some common issues include:
- Chestnut Blight: This fungal disease has devastated American chestnut populations. To help prevent it, ensure good air circulation around the tree and avoid planting in overly damp conditions.
- Insects: Pests such as aphids and scale insects can affect chestnut trees. Regularly inspect your tree for signs of infestations and treat them promptly using organic insecticides or horticultural oils.
As you work on your chestnut tree, you may want to learn about how to germinate chestnut seeds. This process is like the initial germination steps discussed earlier. The key is to provide the right conditions and care. By ensuring proper soaking and cold stratification, you can maximize your chances of successfully germinating more seeds in the future.
Step 6: Harvesting Chestnuts
After several years of growth, your chestnut tree will begin to produce nuts. Harvesting chestnuts is an exciting time and requires careful timing. Here’s what to keep in mind:
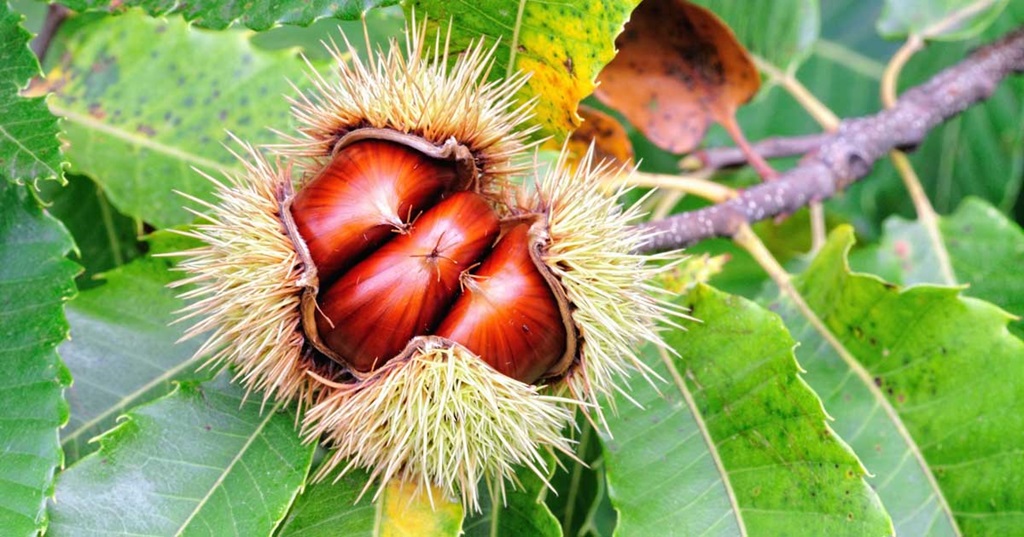
- Timing the Harvest: Chestnuts are typically ready to harvest in late summer to early fall. When the spiky husks start to split open, it’s a good indication that the nuts are ready.
- Harvesting Process: Wear gloves to protect your hands from the prickly husks. Gently shake the branches or use a stick to dislodge the chestnuts. Collect them from the ground and remove any damaged or spoiled nuts.
- Storing Chestnuts: Freshly harvested chestnuts can be stored in a cool, dry place. They can also be frozen for longer preservation. To freeze, first blanch them in boiling water for about two minutes, then cool and pack them in airtight containers.
Unique Uses for Chestnuts
Beyond growing and eating chestnuts, there are several unique and uncommon uses for this versatile nut:
- Chestnut Flour: Chestnuts can be ground into flour, which is gluten-free and can be used in various recipes. It adds a slightly sweet flavor and is great for baking.
- Crafting Material: The sturdy shells of chestnuts can be used for crafting projects, such as making decorations or even jewelry.
- Natural Fertilizer: The leaves of chestnut trees can be used as mulch or compost, providing nutrients to the soil as they break down.
- Wildlife Habitat: If you have a large space, consider planting multiple chestnut trees to create a habitat for local wildlife. Animals such as squirrels, deer, and birds benefit from the nuts and shelter provided by chestnut trees.
Conclusion
Growing a chestnut tree from a chestnut can be a fulfilling and enriching experience. From enjoying the delicious nuts to enhancing your landscape, the benefits are abundant. By following the steps outlined in this guide, you can successfully cultivate your own chestnut tree and enjoy the fruits of your labor for years to come.
Remember to be patient; chestnut trees may take a few years to produce nuts, but the wait will be worth it. Whether you’re planting one tree or many, you are contributing positively to the environment and creating a beautiful space for yourself and others to enjoy.


Average Rating